Chimney Repair: Understanding the Basics
Proper maintenance and timely repairs are key to extending the lifespan of your chimney. Understanding the basics of chimney repair will help you identify issues early on and prevent further damage. Let’s delve into the fundamentals.
Signs That Your Chimney Needs Repair
Spotting the warning signs of chimney damage is crucial in preventing costly repairs down the line. Keep an eye out for the following indicators:
- Cracked or crumbling mortar: If you notice cracks or loose mortar joints between the bricks, it’s a clear sign of chimney deterioration.
- Water leaks: Water stains on the walls or ceilings near your chimney could indicate a chimney leak.
- Efflorescence: The appearance of white, chalky residue on your chimney is a sign that water is penetrating the masonry.
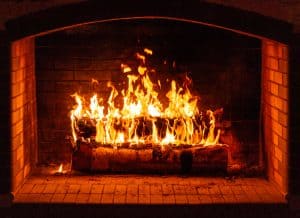
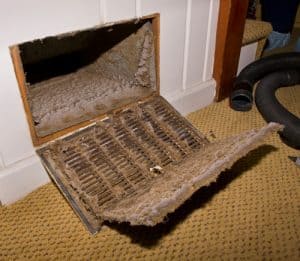
- Soot buildup: Excessive soot or creosote deposits can indicate a chimney blockage or ventilation issue.
- Damaged chimney cap: A broken or missing chimney cap leaves your chimney vulnerable to water, debris, and animal intrusion.
- Smoke issues: If you experience smoke entering your home or an unpleasant smell, it could signify a problem with your chimney’s draft.
DIY Chimney Repair: What You Can Do
While some chimney repairs require professional expertise, there are a few tasks you can tackle on your own. However, always prioritize your safety and consider hiring a professional if the repairs seem beyond your capabilities. Here are some DIY chimney repair solutions:
1. Repairing Minor Mortar Cracks
Materials:
- Mortar mix
- Trowel
- Wire brush
- Safety goggles
Steps:
- Use the wire brush to clean out loose mortar from the cracks.
- Mix the mortar according to the manufacturer’s instructions.
- Wet the cracks with water using a spray bottle.
- Apply the mortar to the cracks, smoothing it with the trowel.
- Allow the mortar to cure for at least 24 hours before using the chimney.
2. Clearing Obstructions
Materials:
- Chimney brush
- Extension rods
Steps:
- Ensure you have the appropriate size chimney brush for your flue.
- Attach the brush to the extension rods and extend it into the chimney.
- Use a sweeping motion to remove any debris or blockages.
- Repeat the process until the flue is clear.
Remember, these DIY solutions are suitable for minor issues only. For complex problems, it’s best to consult a professional chimney repair service.